Hello, dear Windows users!
It’s finally time to start developing Smart Contracts right from your Windows machine! ![]() This tutorial is designed to help you set up your development environment. After following these steps, you’ll be able to develop just like any Linux or macOS user.
This tutorial is designed to help you set up your development environment. After following these steps, you’ll be able to develop just like any Linux or macOS user.
 Setup Guide
Step 1 – Install WSL2
WSL (Windows Subsystem for Linux) allows you to run a Linux environment directly on Windows. It’s essential for compiling smart contracts.
Installation steps may vary depending on your Windows version, but luckily, Microsoft has already created a great official guide. Please follow the link below, complete the WSL installation, and come back here when you’re done:
Step 2 - Install Ubuntu on WSL
Good news: the hard part is already done!
Now that WSL is installed, we need to add a Linux distribution. Windows makes this super easy:
-
Open the Microsoft Store (just type store in the Windows search bar).

-
Search for Ubuntu 24, and click on the first result.
-
Click Install.
-
Once installation finishes, you’ll be able to find Ubuntu 24 in your Windows search bar.
-
Open it, and it will prompt you to configure your Linux user (username and password). Choose something simple and easy to remember.

-
After that, you’ll see the Ubuntu terminal. That means everything is installed correctly. You can now close the terminal.


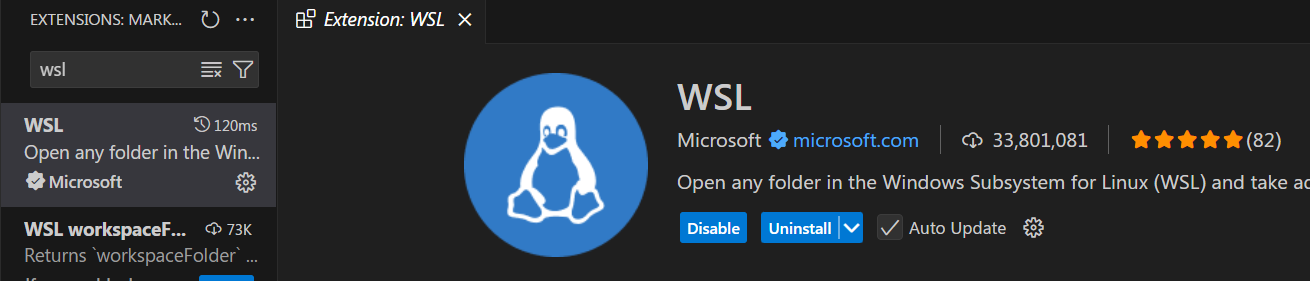
Step 3 - Connect VSCode to Ubuntu (WSL)
VSCode offers a native extension from Microsoft that lets you work in the Linux environment directly from Windows.
-
Install the WSL extension from the VSCode marketplace.
-
Open the Command Palette (View → Command Palette).
-
Search for and select “Connect to WSL using Distro”.
-
Choose Ubuntu 24 from the list.
-
You’ll now see Ubuntu 24 listed in the bottom-left corner of VSCode. That means your terminal, files, and extensions are now operating inside Ubuntu!


Step 4 - Install Klever Blockchain IDE
You might already have the Klever extension installed on Windows, but we also need to enable it in your Ubuntu (WSL) environment.
- While connected to Ubuntu 24, search for the Klever Blockchain extension in the VSCode Marketplace. If it’s not enabled yet, you’ll see an option to enable or install it.

Step 5 - Install Pre-Requisites
 Install Rust
-
Open the terminal (View → Terminal).
-
Run the following command:
curl --proto '=https' --tlsv1.2 -sSf https://sh.rustup.rs | sh
- When prompted, press Enter to proceed with the default installation.

 Install Developer Dependencies
Ubuntu needs some packages to compile smart contracts to WebAssembly (WASM). Install them by running:
sudo apt-get update
sudo apt install -y pkg-config build-essential libssl-dev
Note: You may be asked to enter the password you created earlier during the Ubuntu setup.
Restart the IDE
Some of the steps above affect the system environment, so restart your IDE to apply changes. If VSCode doesn’t reopen your project automatically:
- Reconnect to WSL by repeating Step 3.
Step 6 - Start a New Project
Create a folder for your project:
- Open the terminal (View → Terminal)
- Run:
mkdir demo(or any project name)
Open the folder in VSCode:
- Go to File → Open Folder
- Navigate to
/home/<your-username>/demo
Open the Klever Extension Tab

The Klever extension will prompt you to install required tools.

If it doesn’t prompt you automatically, run:
- View → Command Palette → KleverChain: Setup Workspace
Step 8 – Create Smart Contract Files
- Go to the Klever Extension tab.
- Under Templates, click New Contract in the Empty template.
- Enter a name for your contract (e.g.,
demo).


Step 9 - Configure Rust for the Project
Rust requires per-project configuration. For each new project:
Open the terminal and run:
rustup override set stable
rustup target add wasm32v1-none
Step 10 - Compile the Smart Contract
-
Go to the Klever Extension tab.
-
Refresh the contract list.
-
Right-click your contract and choose Build Contract.
-
If you see a
 green success message, congratulations — everything is working!


If you encounter any errors, reply to this post with the details and we’ll help you out.
Step 11 - Set Up a Testnet Account
To deploy your contract, you need a funded testnet wallet.
11.1 – Create a Wallet
- In the Klever tab, click the PEM icon to generate a new wallet.
- Copy the address shown.


Copy that adress, we will use it on the next step.
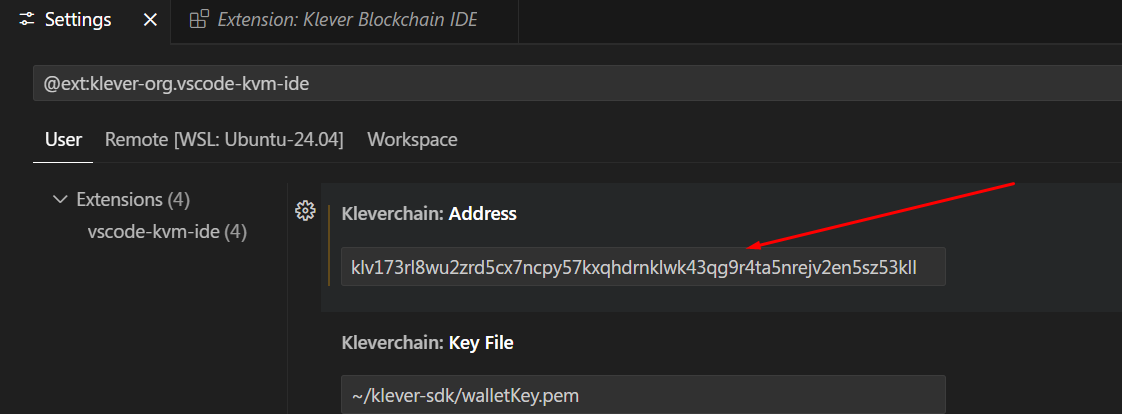
11.2 – Configure the Address
-
Go to Extensions → Klever Blockchain → Manage (
icon) → Settings
-
Paste your wallet address in the Address field (you can replace the example address).

11.3 - Fund Your Wallet
-
Now that you configured the address, click the $ icon in the Klever tab to request testnet KLV tokens
-
If successful, you’ll see a confirmation in the terminal.


12 - Deploy the Contract
Finally, let’s deploy your contract!
-
Right-click your contract in the Klever tab.
-
Click Deploy Contract.
-
In the deployment page, click Create Transaction.
-
If you see a transaction hash in the result — boom
 — your contract is live on the testnet!


You can verify it on Klever Testnet Explorer by searching for your transaction hash.
Here’s an example: View Example Deployment
 What’s Next?
Interacting with your contract is outside the scope of this tutorial, but now you have everything set up for development and deployment.
 We Want Your Feedback!
We’re working hard to make our tutorials more clear, helpful, and beginner-friendly. Let us know:
- Was this tutorial helpful?
- What could be improved?
- Would you like to see this format added to docs.klever.org?
Leave a comment or reach out — your feedback helps us a lot! ![]()
Wishing you success with your smart contracts! ![]()